Removing Plastic Skin in AI Video: Real Film Grain Overlay Techniques in CapCut
A step-by-step workflow for blending real 8mm, 16mm, and 35mm film grain scans as CapCut overlays to eliminate unnatural, plastic-looking skin in AI-generated v
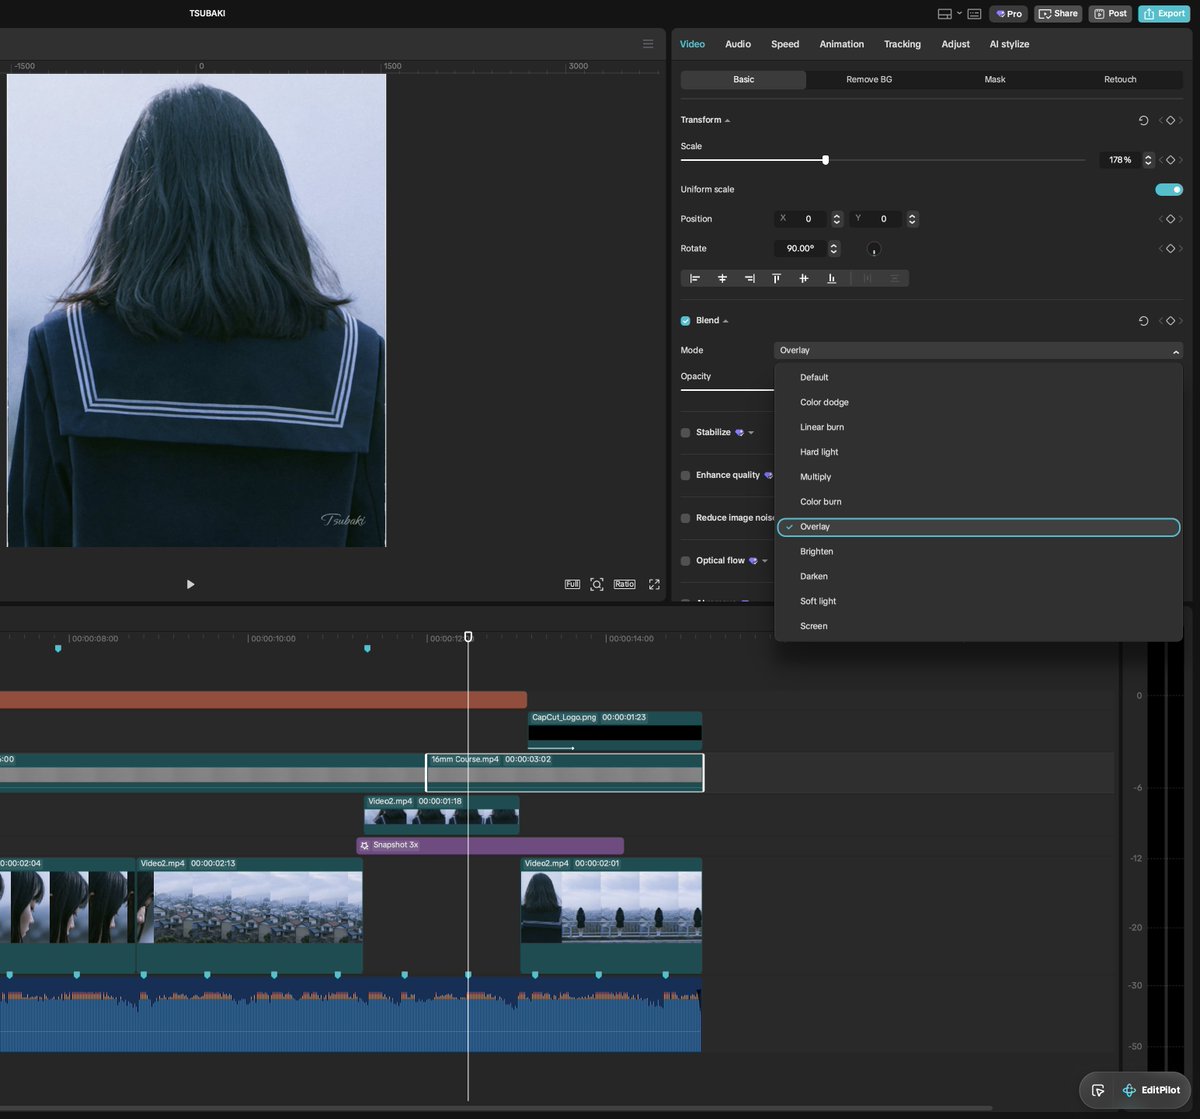
AI video creator TSUBAKI (@AI__TSUBAKI) on X has shared an actionable post-production workflow to eliminate the unnatural, overly smooth "plastic skin" texture typical of AI-generated videos by compositing real analog film grain scans as video overlays.
Image source: @AI__TSUBAKI
While modern generative video models produce remarkably sharp outputs, their algorithmic rendering often yields unnaturally clean and uniform surfaces. Human skin in particular can end up looking artificial and synthetic—resembling smooth plastic or doll skin. Compositing a scan of authentic analog film stock over the footage introduces subtle, organic grain that moves and breathes naturally across frames, restoring a tactile cinematic feel.
The Organic Texture of Real Film and Stock Formats (8mm, 16mm, 35mm)
Unlike static digital noise filters, scans from real photochemical film stocks possess authentic, randomized grain structures that respond organically to motion and luminance. The aesthetic impact depends directly on the chosen film gauge.
The fundamental rule of film formats is that smaller film gauges produce larger, rougher grain particles.
- 8mm Film: Delivers heavy, tactile, and coarse grain. Ideal for home video aesthetics, nostalgic memory sequences, dream-like scenes, or lo-fi creative styling.
- 16mm Film: Produces clearly defined yet balanced, natural grain. Perfect for indie cinema, music videos, and documentary aesthetics; this is the gauge showcased in the original demonstration clip.
- 35mm Film: Features fine, delicate, and restrained grain particles. Excellent for clean theatrical cinema looks where high resolving detail is preserved without sterile digital smoothness.
Step-by-Step Workflow: Blending Film Grain in CapCut
Using CapCut, creators can easily integrate free film grain stock scans with the following three-step process:
- Acquire the Grain Assets: Search for "film grain free" to find authentic film scan packages. The key is selecting a pack that bundles 8mm, 16mm, and 35mm assets together so you can match the grain structure to the specific needs of each project.
- Select the Appropriate Gauge: Choose between 8mm, 16mm, and 35mm depending on the target mood.
- Composite and Blend in CapCut:
- Place your AI-generated video clip onto the main timeline track.
- Add the film grain video clip onto an overlay track directly above the video.
- Loop the grain clip across the timeline to cover the entire duration of the footage.
- Set the blend mode to Overlay.
- Set the initial opacity to around 30%–50%, then fine-tune visually based on clip brightness and skin tones.
Quality Preservation: Preventing Compression Artifacts
Addressing community questions regarding perceived quality degradation when adding noise, the creator highlighted critical export considerations:
- High Resolution and Bitrate: Because grain particles create continuous micro-variations across every pixel, encoding at low bitrates can trigger harsh compression artifacts and blockiness.
- To prevent quality loss and preserve the organic motion of the grain, export the finished edit at higher bitrates and in 4K resolution.
Experimenting with all three gauges on the same footage allows editors to observe how dramatically the emotional tone changes, making real film grain one of the fastest and most reliable tools for elevating generative AI video.
Original source
- TSUBAKI (@AI__TSUBAKI) on X: How to make AI videos look more cinematic - Film Grain Overlay Tutorial